|
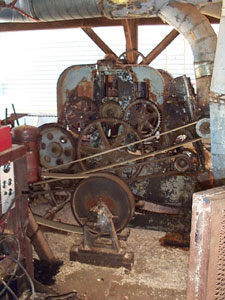
After the timbers have been dried in the kilns, Richard fires up our 1920 vintage
Yates Model 14 Timber Sizer and we
mill the timbers. Milling reduces the overall size of the timber to almost it's
finished dimensions. Richard and the crew will later hand plane each timber bringing
it into tolerance and giving it a final finish.
|
|
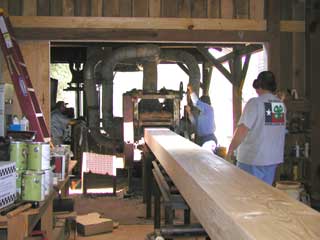
The Yates Model 14 can mill very large timbers. This one will become a plate resting
at the top of a frame. Roof trusses will rest on the plate and support the roof
line of the home. Plates carry a lot of weight and need to be large enough to handle
the stresses. I think this one could support a battleship!
|
|
|
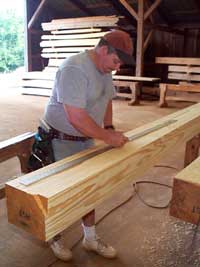
Doug is "laying out" the joinery and the cuts required to fabricate individual
pieces of the frame. By layout, we mean that he actually draws the exact dimensions
of the cuts on the timbers themselves using the frame construction drawings as his
guide. This is precision work and Doug must be very accurate. One of the crew will
recheck his layout to ensure that it is done correctly. Quality control procedures
are strictly followed at this point. We don't want to make a mistake and have to
do the work over.
|
|
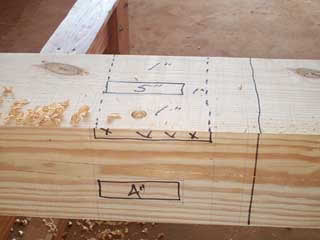
You can see that each cut and each joint is clearly defined. When the layout drawings
are checked for accuracy, a black mark defining the cut is drawn on the timber.
Black markings are only put on checked and verified layouts. Of course the black
marks are planned off the finished timbers so you never see these in your home.
|
|

|
Once the layout is verified, the peg holes are drilled using a builders triangle
to ensure a perfect perpendicular hole. Drilling peg holes at this point in the
timber fabrication ensures that the hole is uniformly round and at the proper angle.
It would be very difficult to drill holes in joints that have already been cut.
If Keith slips with the drill now, it could cost us several days work!
|