All of the posts, rafters and purlins are complete and final finishing continues
as Richard starts the finished detail work. All of the arch sections and hammer
beams have been laid out. Layout work has been completed for all chapel timbers.
Most of the work in the shop is now focused on completing the laminated arches,
arch sections and hammer beams.
|
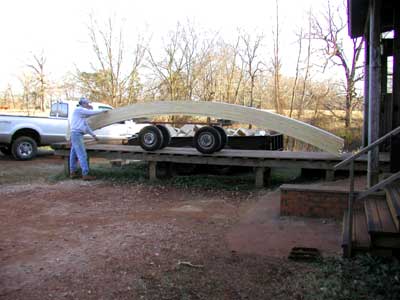
The third laminated arch is moved out of the shop in late evening. Its size demands
a lot of care when we move it around.
|
|
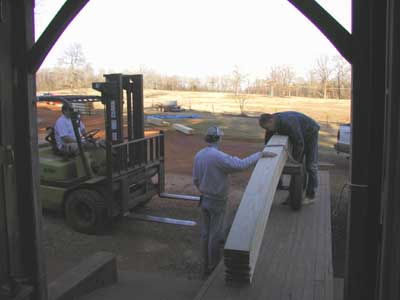
Will handles the forklift while Keith and Kevin stabilize the arch and set the rigging
straps. The tangs of the forklift do not touch the arch as they will damage its
surface. The lifting straps fitted to the arch are attached to the forklift tangs
and the arch is lifted by the straps.
|
|
|
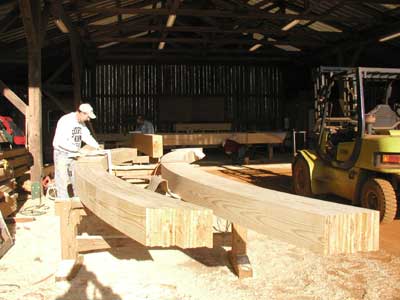
The next morning, Keith checks Tim's layout on laminated arch #3. He will cut the
joinery for arches #2 and #3 today. You can see Tim laying out the joinery detail
on one of the hammer beams towards the back of the shop.
|
|
Jim continues his work finishing out the tenon joinery on the individual arch sections.
He and Arvel are nearing the end of the work needed on these arch sections.
|
|
|
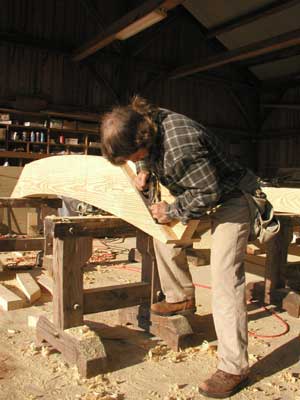
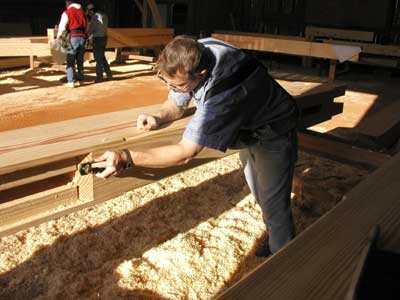
Richard has begun the fine detailing of the chapel post. Here he uses a hand plan
to level a very small high section just before an arch mortise seen just to the
left of his left hand.
|
|
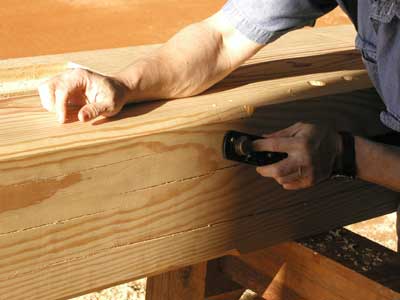
Richard is chamfering an edge on the post. You can see the detail work just under
his right hand and above the hand plan. Chamfering the edges of the post gives them
a more elegant and finished appearance. Since the arches in the chapel will be the
center of attention, detailing the post is like crafting a fine frame for the center
artwork. This kind of work requires a skilled touch and a lot of hand work by Richard.
|
|
|
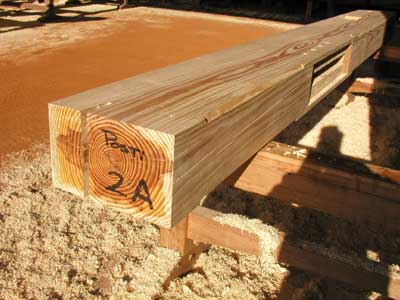
Detailing on Post 2A has been completed. Although difficult to see in this picture,
you should notice the chamfered edge on the right side of the post. The left edge
remains straight as it will face the wall surface. The straight edge will make a
cleaner transition from the wall to the post. The slot you see in the post end is
where the foundation anchor plate will be set which will fix the post firmly to
the foundation.
All that remains to be done to Post 2A is the application of the wood finish.
|
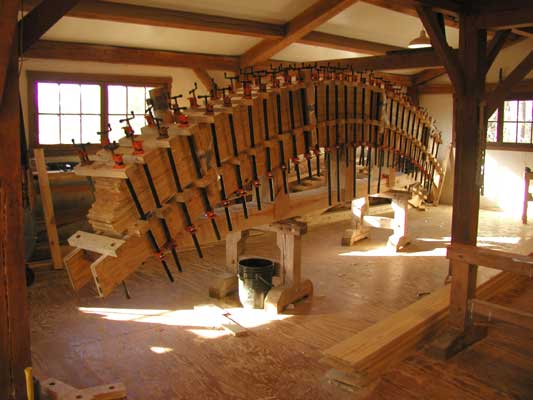
Laminated arch #4 has just been clamped down and will cure for the next 6 hours.
We will start arch #5 at the end of the day.
I included a slightly larger image of this arch so that you could see the number
of clamps needed to apply bending pressure to the laminations.
Completion of arch #4 puts us halfway through the eight laminated arch sections
we will build in this fashion.
Work continues on as the number of finished timbers continues to grow.
|
|